Computer graphics
The tale of a groundbreaking 3D design technique
Date:
Date:
Changed on 21/11/2023
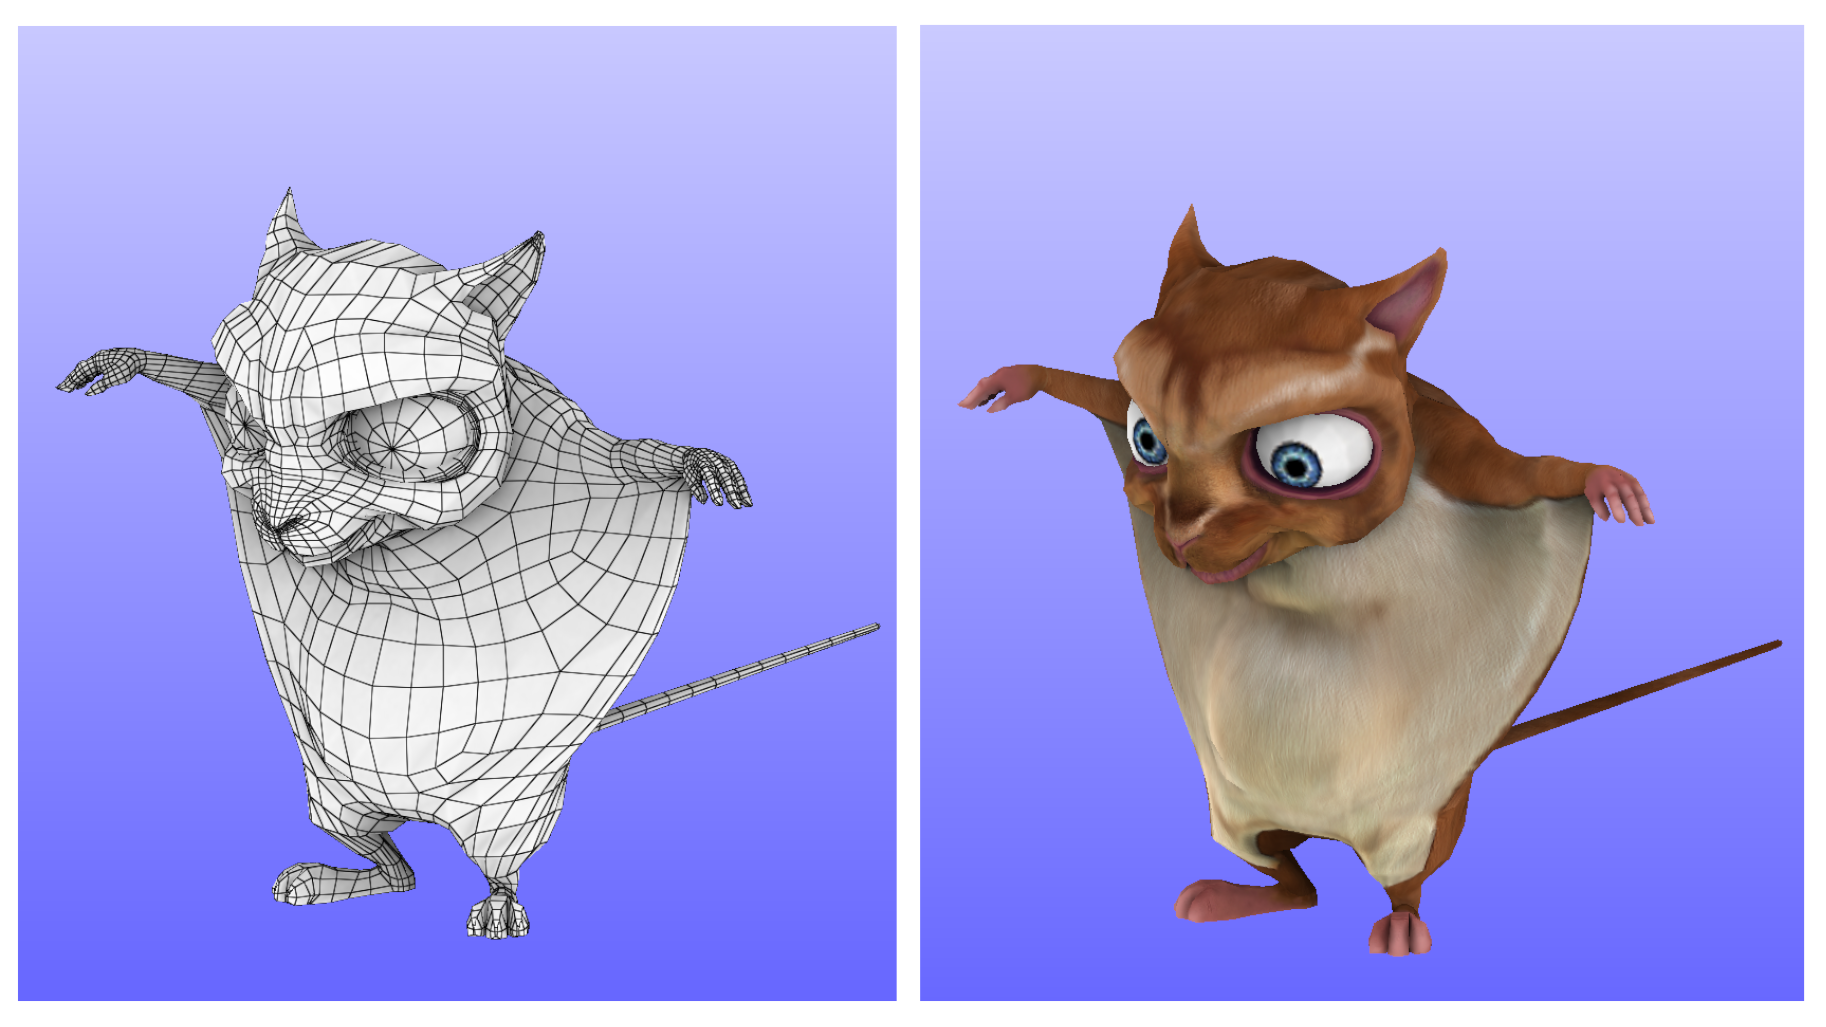
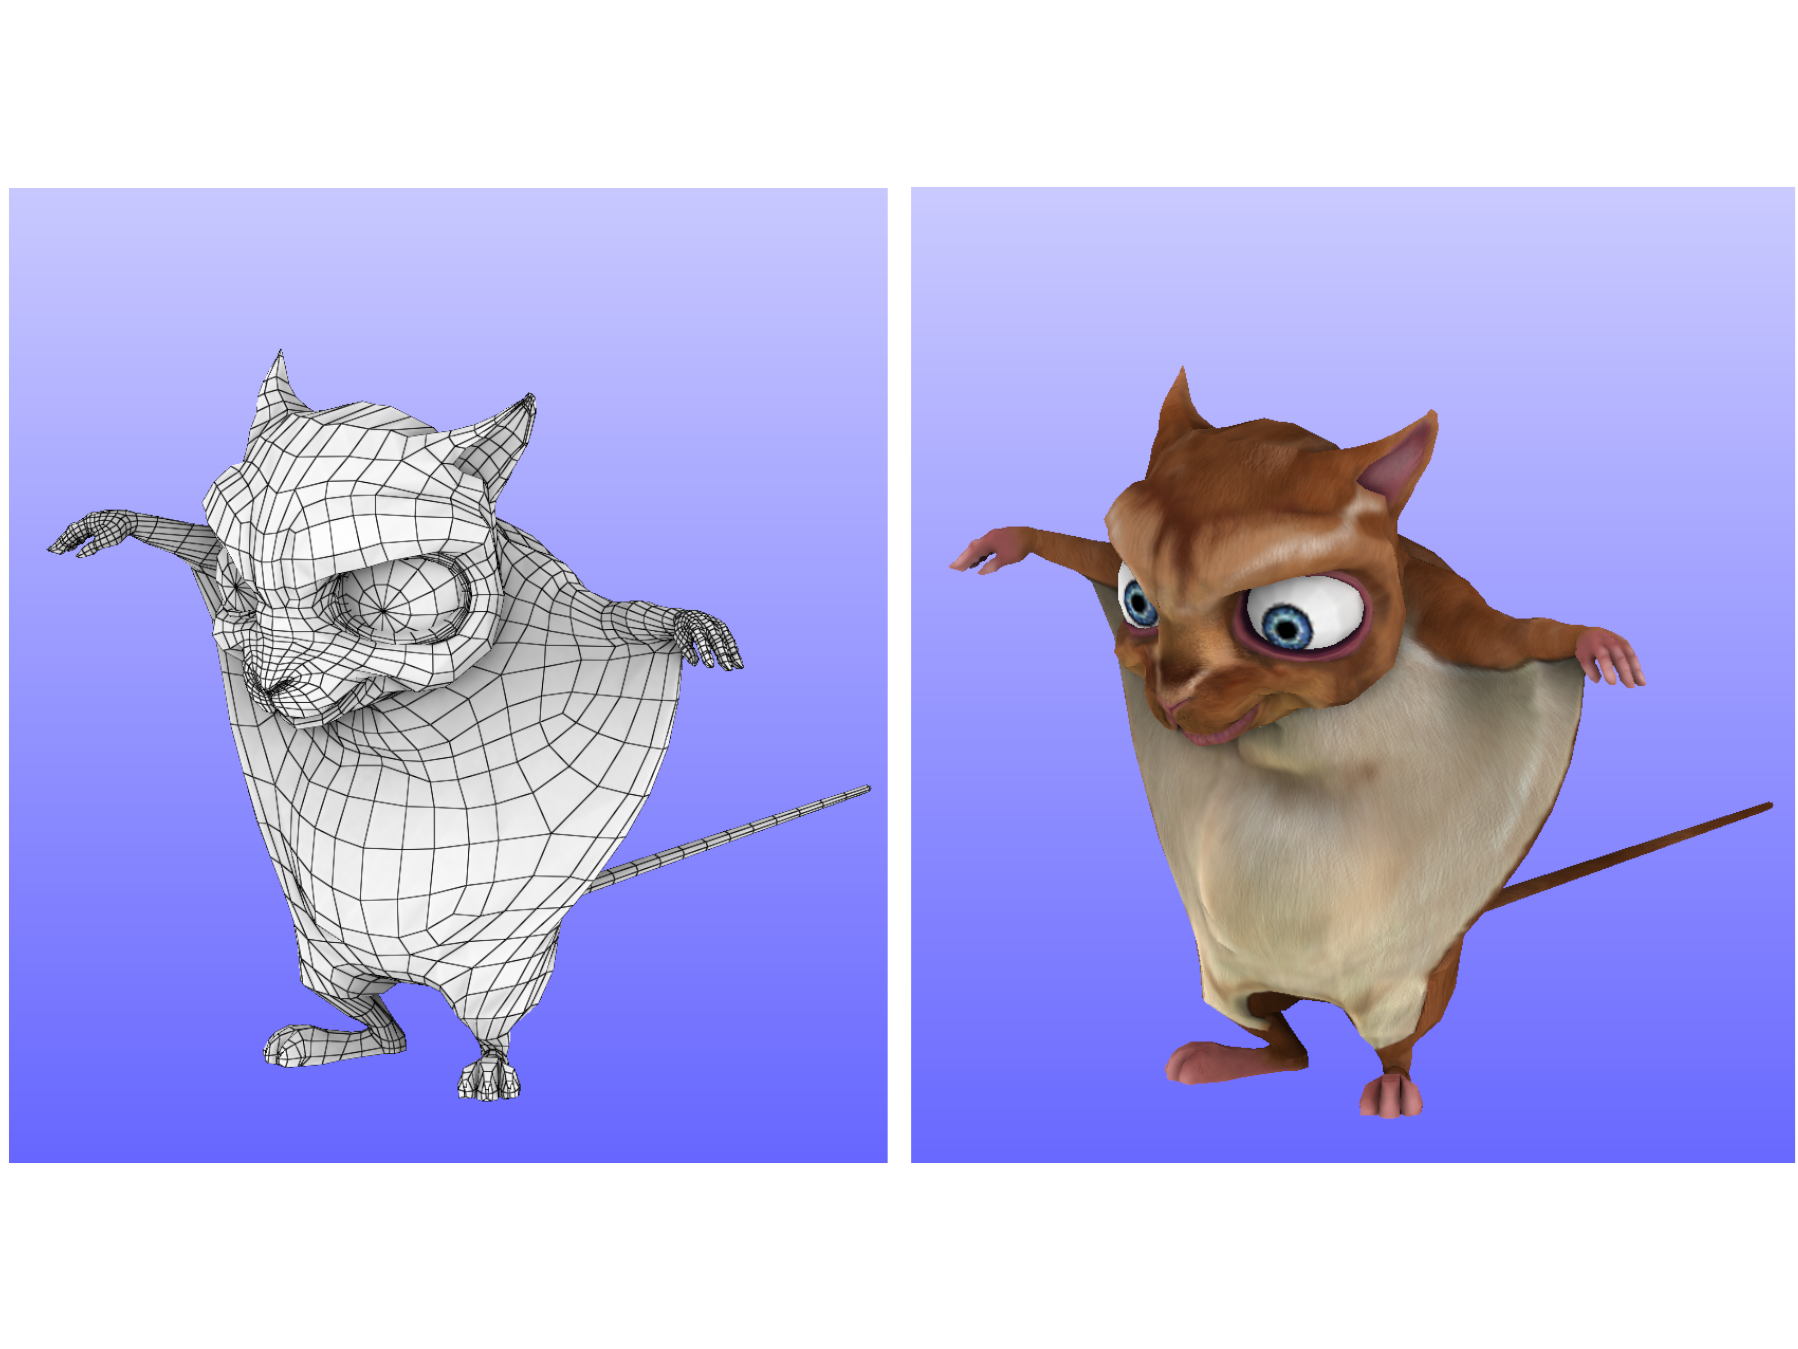
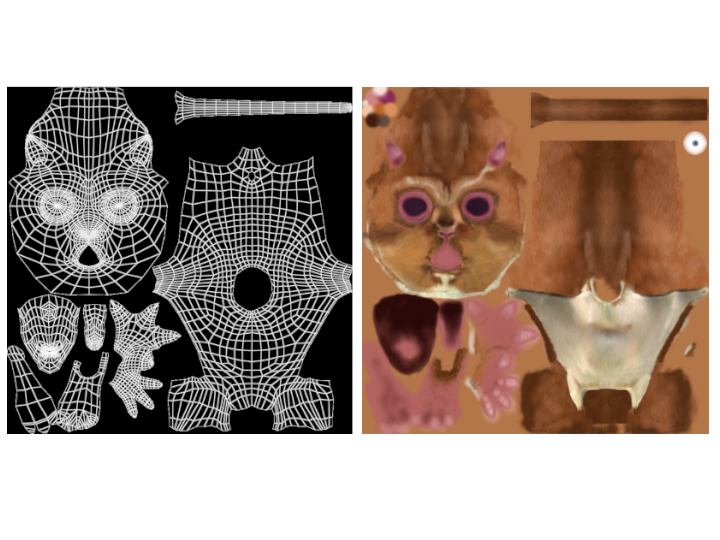
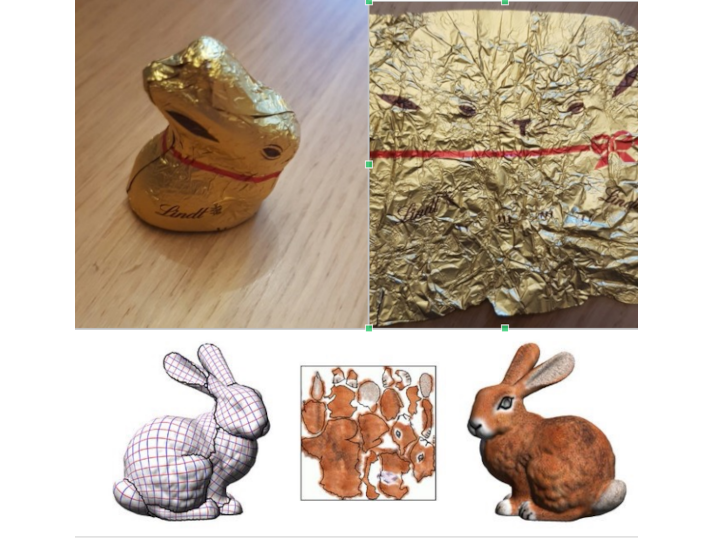
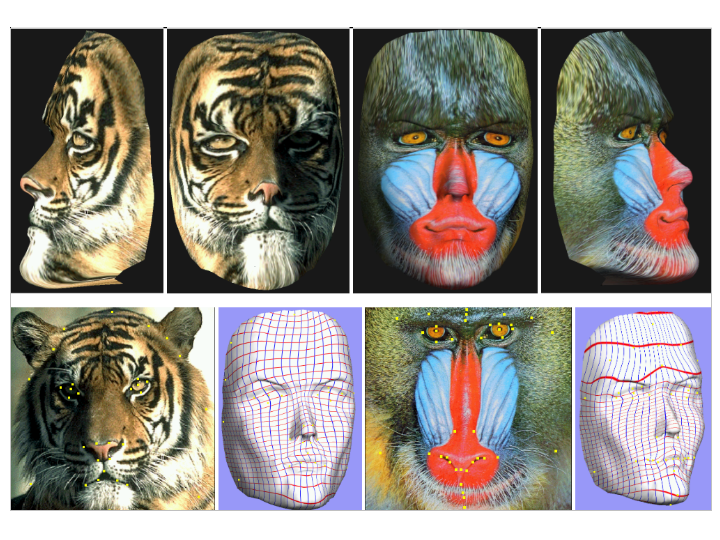
Usually, the computer-generated characters and scenery and special effects for films and video games are initially composed of small polygons. Texture mapping is the process we use to apply the polygons to the 3D image. The method involves dividing a 3D object into several smaller parts, which are then laid out flat, allowing the artist to paint the 2D image, called the “texture”, onto them. The result can be viewed in 3D using graphic maps.
The technique was developed in 1975 by Edwin Catmull for very simple surfaces described by an equation and of which the 2D mesh was already known. On the other hand, for polygon-based surfaces, finding the “right way of unfolding the mesh” was a problem that remained unsolved until the 2000s.
How did I begin my adventure in this field? During my PhD in Geosciences, I studied unwrapping and mesh generation for subsurface modelling, based on the DSI method developed by Jean-Laurent Mallet, my PhD Supervisor. Together, we developed a technique to generate 3D grids for simulating subsurface flow. I was very interested in the field of computer graphics and decided to apply the problem to texture mapping. In 1998, I presented an initial method at Siggraph, the world’s leading conference in the field, held at Orlando, Florida, at the time.
It was a very important event for me. I was still a PhD student at the time and it was my first conference. I gave my talk in front of an audience of 10,000 people in a room as big as a train station, with a close-up of my face projected on to a 2x2-metre screen! It was very hot and the humidity in the air created condensation on the slides (which we were still using at the time), making them appear a little blurred. I initially began to stress before realising that, in this vast room, only the front two rows would notice anything…
I continued to explore the topic after the conference and developed a new solver to speed up the calculations. In 2001, I published an extension that allowed the association between the 3D object and the image to be corrected "manually”. That same year, I had the idea of applying certain mathematical methods (Cauchy-Riemann equations) to find the right texture coordinates automatically.
During a train trip between Nancy and Paris, which took four hours at the time (there were no high-speed trains back then), I spent the outbound journey working on the maths and the return journey working on the computer program. The process worked better than I expected and I let out a cry of delight in the carriage, which attracted some funny looks from the other passengers! Thanks to the Cauchy-Riemann equations, the method could replace hours of very time-consuming manual work with a simple click!
I talked to Jérôme Maillot, who at the time worked for Alias|Wavefront, the company that developed Maya, one of the main 3D design software packages. He was also studying automatic texture mapping and I went to visit him in Toronto. It turned out that we had developed the same equation independently! We decided to write a joint article on the subject, assisted by several colleagues at Inria. Nicolas Ray worked on the mesh cutting and layout of the pieces in the image in order to minimise wasted space, while Sylvain Petitjean studied the mathematical properties of the method (which involves matrices with complex numbers, if you’re interested in the technical details!).
The paper was published at Siggraph in 2002 and I went to present it. Unfortunately, I caught a cold because of the air conditioning on the plane, which subsequently turned into pneumonia, so I gave my talk with a fever of over 38° celsius! I nearly died on stage like Molière... And I got married just after that!
We considered patenting the method, but Alias|Wavefront wasn’t able to manage co-owned patents at the time. I therefore released the prototype program, called LSCM, as an open-source resource (see insert), which turned out to be a very good decision! I was soon contacted by Brecht Van Lommel, one of the developers of Blender, an open-source 3D design tool. I designed a version of LSCM and its digital solver for him in C (OpenNL), which could be easily integrated into Blender.
The “automatic texture mapping” function soon became standard in 3D design and the leading programs added an “LSCM” button to their tool. Today, the technique (or variants of it) is still very widely used in films and video games.
Although the name is tricky to remember, the “LSCM” button launched by Blender was a success and the publishers of other programs kept the same name. Today, the term “UV unwrapping” is more commonly used (UV refers to two coordinates on the 2D map).
The LSCM module is available from the Geogram open-source library and in the Graphite program.